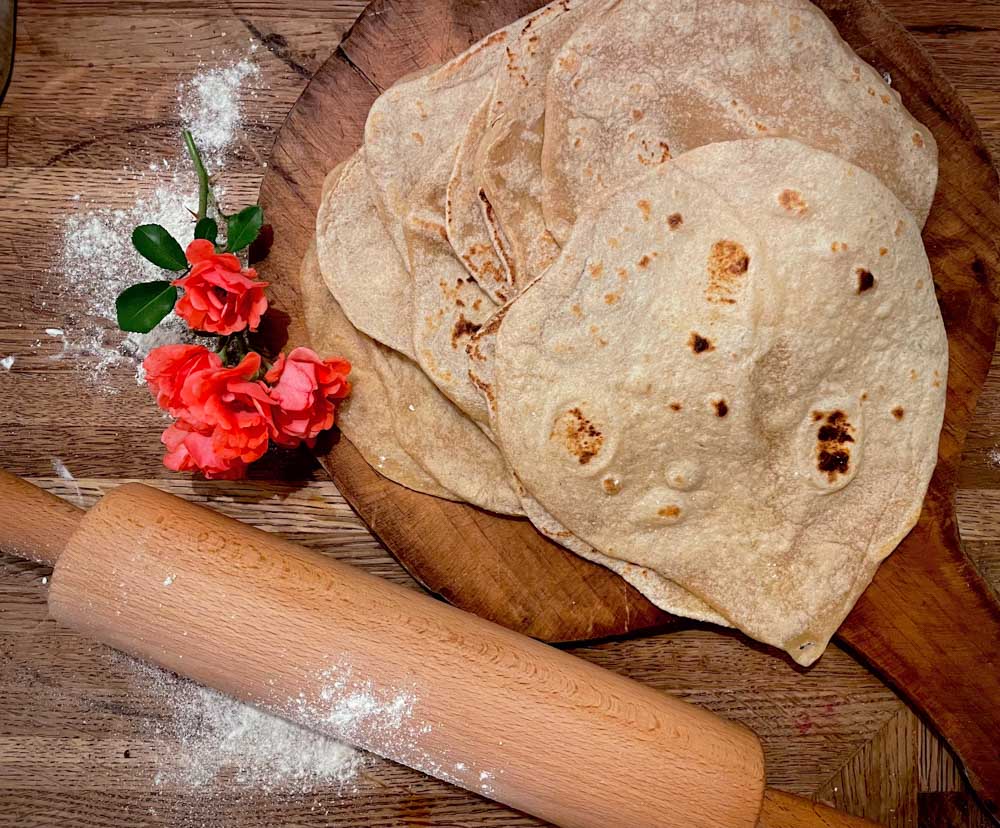
freshly milled whole wheat tortillas
I’m here to say, homemade freshly milled whole wheat tortillas are not so hard. In fact, they’re not hard at all. And they’re actually really, really good!
They are soft yet complex in texture, smell like warm olive oil and a baker’s oven and taste wonderfully wholesome. Even the visual irregularities are a welcomed aesthetic against the modern monotony of uniformity.
A note about the wheat

You’ll want a hard wheat, AKA a high protein wheat, because wheat protein = gluten, and gluten = stretchy, elastic and able to hold a bubble.
While this recipe does focus on gluten development (achieved through kneading the dough causing a “web” of structure to form), it does not require proofing. There is no rising time to constrain your schedule. The only time requirement is the *rest* for the sake of hydration, which I’ll talk about momentarily.
This recipe is my adaptation from Sue Becker’s book, which has taught me so much about the best uses for each kind of grain. I source my wheat berries from Azure Standard. If you haven’t already, you should check them out.
How To
Grind your wheat and add in the bit of salt and baking powder. In the standing mixer, add a cup of warm water and the olive oil. Now combine everything into the mixer and allow the dough to knead on low for for a minute or so, until a dough ball forms. Turn off the mixer and let the dough rest for a while, at least 10 minutes. It’s not finicky. You can’t mess this part up.
Of course you could do this by hand too. And we would all admire you from a distance.


Resting & Soaking
“Resting” allows the flour to become hydrated, which makes all the difference when it comes to working with freshly milled whole wheat dough! It becomes compliant. It’s akin to toddler who’s had a nap vs. one who hasn’t.
When your dough has rested for at least 10 minutes (or longer is just fine) and is feeling particularly amicable, turn the mixer on low again and let it spin for a few minutes or until the dough looks entirely smooth and consistent. It should seem elastic and soft and prefer to stick to itself in one large form rather than to the sides of the bowl.
If it’s too wet, feel free to throw little spoonfuls of flour in until it looks right. On the other hand, if the dough is too dry, that’s a bigger problem. Add tiny sips of water until your dough is happy and hydrated.
Here mine is pillowy and stretchy while not sticking to the sides. I was able to pull it out of the bowl with little fuss. Not to brag.

Now for the fun part
On your biggest cutting board, or directly on your clean countertop, drizzle some olive. Rub a little oil on your hands and on to your rolling pin as well.
If you’re using a griddle or a pan, you’ll want that nice and toasty before you slap down a tortilla, so go ahead and turn on the heat (about medium). I personally use my flat top range like a griddle, like literally cooking on the hot glass, and it works great. No one has stopped me, so, I’m going to keep doing it.
Go ahead and use as much olive oil as needed to accomplish the shaping of the tortillas. It will only add to the flavor and it will prevent you from saying bad words in front of children.


a cutting board P.R. statement
I was shunned for using this plastic cutting board. My sisters-in-law where aghast. I was ashamed of my choices. It since exited my life dramatically when it melted on my stove and had to be pried off and thrown away. I bought a wooden one. Everything is at rights. I am not replacing the photos though, and I don’t know how to use A.I., so use your imagination.
To form the tortillas, you’ll push down the little dough ball with your fingers, and then roll out the tortilla, first one way, then another, and then pick it up and gently pull it until you’re satisfied with the thinness. Most importantly, make sure the thinness is consistent so it all cooks at the same rate!


I have since learned…
We were invited to someones house for dinner who was making her own tortillas, and I watched and took notes. Rather than cutting the big dough ball into even pieces and then shaping into little dough balls, she took the whole dough ball and pinched off the little dough balls with her thumb and index in the shape of the “OK” sign. I have since adopted this method. It’s faster and more fun.
Lay it on the heat in whatever fashion you find works for you. Wait until it begins to bubble up and becomes more opaque than glossy and then flip! Wait until it begins to puff again, and it’s done. Move it to the rack and repeat.
I can typically get into a rhythm of rolling out the next tortilla while the previous one is on the stove, and then doing a swap out, and repeating.
And just like that, you’re done!
Now go make something really good with them, like steak and cheese quesadillas or homemade enchiladas or Cuban chicken black bean wraps!
… And if there’s left overs, Buñuelos!


FMWW Flour Tortillas
Ingredients
Method
- Pour all ingredients into the bowl of your stand mixer fitted with the dough hook attachment.
- Knead the dough on low until well incorporated, 2-5 minutes.
- Turn off the mixer and allow dough to rest and soak for at least 10 minutes.
- Knead again on low again for about 3 minutes. The dough ball should become well formed, elastic and glossy. It should not be sticking to the sides of the bowl at this point. NOTE: If your dough seems too dry, it's ok to add water, and if it seems too wet and sticky, it's ok to add flour, just add a little at the time and allow it to fully incorporate. Error on the side of hydrated, not dry.
- Pull the dough from the mixing bowl and form a dough ball with well oiled hands and set it on a large, clean, oiled work surface.
- You could divide your dough ball into about 12 even pieces and roll those pieces into dough balls (OR you could squeeze dough balls off of the main dough ball, which is kind of fun).
- Once your dough balls are formed, set them to the side to make a work space for rolling out the tortillas. Put a pan or griddle on the heat (or just use your glass top range if you have one) and let it get warmed up. Set out a cooling rack to receive hot tortillas. (A cooling rack will prevent condensation and soggy tortillas.))
- Press your dough ball flat with your fingers, and then roll it flat into a long oval with the rolling pin. Flip it 90 degrees and roll again to form more of a round shape. Be sure to apply pressure evenly and do not make the middle too thin or taper the edges too much. Overly thin areas will become papery.
- Pick up the flattened shape and gently pull and stretch it with your fingers or let it hang and stretch itself, like a pizza dough.
- Lay it flat onto the hot pan or stove top and do not move it. It will be stuck upon contact, and then quickly cook and become loose. When you see bubbles form and the skin of the dough become more matte than glossy, flip it over. Allow it to become slightly puffy and then flip it onto the cooling rack.
- Repeat the process. These are great served hot off the pan, or let them cool and then seal them up for later use. Freezes well.
Leave a Reply
You must be logged in to post a comment.